Easy Way to Clean a Honda 4 Wheeler Carburetor
How to Clean a Carburetor on an ATV
UncagedShadow offers troubleshooting advice and tips for all-terrain vehicles.

How to clean a carburetor: the Yamaha blaster carb
yamaha blaster carb
How to Clean a Carburetor
Today, I will be instructing you how to clean an ATV carburetor. I will be using a Yamaha Blaster 26 mm carburetor. However, most ATV carburetors disassemble the same and are cleaned the same way.
Step 1
Get all your cleaning supplies together on your workbench.
You will need:
- a can of carb cleaner or brake cleaner;
- small screwdrivers (Phillips and flat head);
- a paper clip unbent to a straight piece;
- emery cloth, sandpaper, or a toothbrush (optional);
- and compressed air (either air compressor or a can of compressed air).
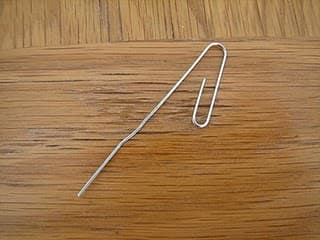
unfolded paper clip
Step 2
Disconnect the carb from the bike. Most of the time, this is done by removing the cap, cable, and slide. There are also many hoses on the carb. They must all be removed. The gas petcock on the gas tank must be turned to "off" and the fuel line disconnected from the carb. The fuel overflow line must be removed. Any oil injection (2-stroke only) and idle lines must also be removed. Bring the carb to your workbench.
Step 3
Turn the carb upside down, unscrew the bottom nut off of the carb bowl, and remove the bowl. Take the carb bowl and spray the inside down with carb cleaner and clean up any residue left from old gasoline. A toothbrush will work pretty well. Spray the bowl with carb cleaner again and re-scrub if necessary. Continue until the inside of the bowl is spotless. If "gunk" still remains, you may need to submerge the bowl in an open container of carb cleaner.
Scroll to Continue
Read More from AxleAddict
Step 4
Remove the hex jets with a screwdriver from under the carb where the bowl was attached. Once removed, spray this part of the carb down with carb cleaner and scrub with the emery cloth or toothbrush. Repeat this step until no more residue is left. You may have to submerge it in carb cleaner with the bowl.
Next, spray the carb cleaner through all the jet holes inside the carb. Cleaner should shoot out of other holes when this is done. Generously do this to the all the jet holes and other orifices to clear their passages.
Step 5
Take the jets you removed and run the unfolded paperclip through them to remove any dust and dirt obstructing the passages. Next, spray the inside passage with carb cleaner.
Step 6
Spray the whole carb down with carb cleaner, inside and out—every hole you can find and especially inside the bore and slide area. Pay careful attention to bowl area and jet/jets area when doing this second spray down.
Step 7
Shoot the whole carb down with compressed air. Spray the bore and slide out. Spray the bowl and underside of the bowl. Spray the jet orifices and jets down very well.
Step 8
Re-install the jets with the screwdriver. Replace carb bowl gasket if necessary. Screw bowl back onto carb. Re-install carb on the bike, re-connect all the lines previously taken off, and test for proper operation. If you notice any leaks around the bowl-to-carb mating surface, you may need a new gasket or some silicone sealant to seal the two together.
Additional Tips
This process is fairly simple to even the most novice mechanic. Simple knowledge of basic hand tools and experience working with mechanical devices will make this task even easier. This process can be done in as little as 20 minutes (as long as no soaking is required) by a DIY mechanic. If you take your time and do not rush every step, you too can complete this task correctly and in minimal time.
- Regarding the soaking of carburetor parts, you will want to buy the liquid carb cleaner that comes in a paint-like bucket. Once you open the can, suspend the carb parts on a stir stick or wrench with wire and lay the stick over the edge of the bucket submerging the parts. Now, you can let the parts soak for a while. I suggest at least 12 hours and, if possible, overnight.
- When submerging the parts, try not get your hands in the carb cleaner, as it can irritate your skin and dry it out. Also, it's not advisable to be exposed to the fumes of the carb cleaner for extended periods. Position the bucket of cleaner and parts in a well-ventilated area.
This article is accurate and true to the best of the author's knowledge. Content is for informational or entertainment purposes only and does not substitute for personal counsel or professional advice in business, financial, legal, or technical matters.
Related Articles
Source: https://axleaddict.com/atvs/How-to-clean-an-atv-carburetor
0 Response to "Easy Way to Clean a Honda 4 Wheeler Carburetor"
Post a Comment